gemellocattivo.com

Which means "Evil Twin". Lets see your projects where you change boring into fun or create the fun from scratch.
It is currently Thu Sep 18, 2025 10:53 pm

All times are UTC - 5 hours [ DST ]


Post new topic Reply to topic  [ 2707 posts ]  Go to page Previous  1 ... 210, 211, 212, 213, 214, 215, 216 ... 271  Next
Author Message
PostPosted: Sun Jan 14, 2024 1:11 pm 
Offline

Joined: Thu Jan 01, 2015 6:47 pm
Posts: 4687
I'm not very good at getting square corners to weld in fully so I ground it away a bit then welded
Attachment:
20240114_092006.jpg
20240114_092006.jpg [ 3.87 MiB | Viewed 2430 times ]

Attachment:
20240114_095006.jpg
20240114_095006.jpg [ 4.27 MiB | Viewed 2430 times ]

Then on to the mill to fit the bearing.
Attachment:
20240114_113033.jpg
20240114_113033.jpg [ 3.79 MiB | Viewed 2430 times ]

Attachment:
20240114_113107.jpg
20240114_113107.jpg [ 4.08 MiB | Viewed 2430 times ]

Clean it up a little
Attachment:
20240114_115011.jpg
20240114_115011.jpg [ 3.92 MiB | Viewed 2430 times ]

and it fits. the new bearings need a bit of preload, I used .004" figuring the case will flex a touch
Attachment:
20240114_115334.jpg
20240114_115334.jpg [ 3.54 MiB | Viewed 2430 times ]

All that remains is add a little cover to the cover to make room for the added length needed for the nut , then I can clean up and tear into fixing the engine.
Attachment:
20240114_115710.jpg
20240114_115710.jpg [ 3.3 MiB | Viewed 2430 times ]


Top
 Profile Send private message  
 
PostPosted: Sun Jan 14, 2024 4:06 pm 
Offline

Joined: Thu Jan 01, 2015 6:47 pm
Posts: 4687
The little cover took longer than I hoped....I didn't have much useful stock
Attachment:
20240114_132409.jpg
20240114_132409.jpg [ 4.02 MiB | Viewed 2428 times ]

Attachment:
20240114_135829.jpg
20240114_135829.jpg [ 3.81 MiB | Viewed 2428 times ]


Eyeball a radius cuz I can't find a cutter
Attachment:
20240114_140701.jpg
20240114_140701.jpg [ 3.14 MiB | Viewed 2428 times ]


Weld
Attachment:
20240114_142449.jpg
20240114_142449.jpg [ 3.58 MiB | Viewed 2428 times ]

then I always spend more time giving it the "obviously its original" treatment but its done and time to clean the shop for engine work.
Attachment:
20240114_150134.jpg
20240114_150134.jpg [ 3.71 MiB | Viewed 2428 times ]


Top
 Profile Send private message  
 
PostPosted: Mon Jan 15, 2024 6:50 pm 
Offline

Joined: Thu Jan 01, 2015 6:47 pm
Posts: 4687
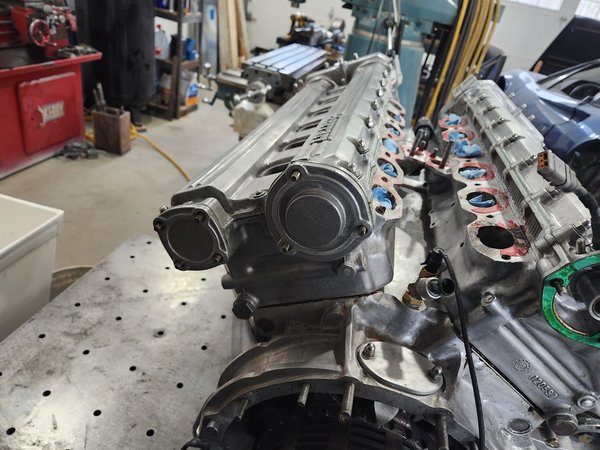
tear down day. every time I look at these end plates Brian G made for me I smile, they just look like they belong
Attachment:
20240115_095300.jpg
20240115_095300.jpg [ 3.19 MiB | Viewed 2407 times ]

I'm clearly not professional mechanic material ...I cut 2 orings installing the cam covers
Attachment:
20240115_100553.jpg
20240115_100553.jpg [ 3.3 MiB | Viewed 2407 times ]

Attachment:
20240115_102012.jpg
20240115_102012.jpg [ 3.29 MiB | Viewed 2407 times ]

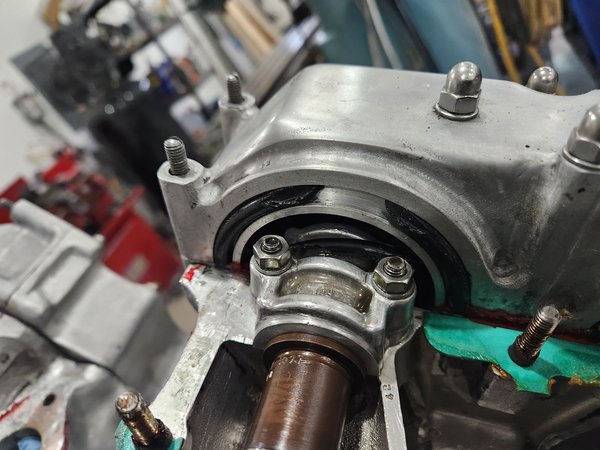
When I originally set it up I made the studs in the top of the timing cover removable thinking they could go on last,

Attachment:
20240115_101001.jpg
20240115_101001.jpg [ 3.5 MiB | Viewed 2407 times ]


but then I need to compress the oring while installing the cover so I switched to installing the cam cover last. This time I will remove the razor sharp edge on the inside corner and maybe replace it with a radius...I am courious where the missing piece might have3 gotten though.
Attachment:
20240115_100938.jpg
20240115_100938.jpg [ 3.3 MiB | Viewed 2407 times ]


The buckets and cams still look very good, that's a plus
Attachment:
20240115_105115.jpg
20240115_105115.jpg [ 3.12 MiB | Viewed 2407 times ]

Slight bend exhaust valves in #12, so the no compression is an easy fix
Attachment:
20240115_135637.jpg
20240115_135637.jpg [ 1.62 MiB | Viewed 2407 times ]


Found the missing piece of oring, yay
Attachment:
20240115_125011.jpg
20240115_125011.jpg [ 2.3 MiB | Viewed 2407 times ]

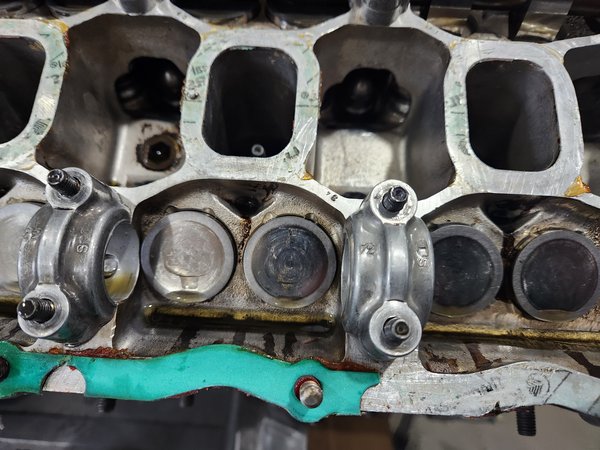
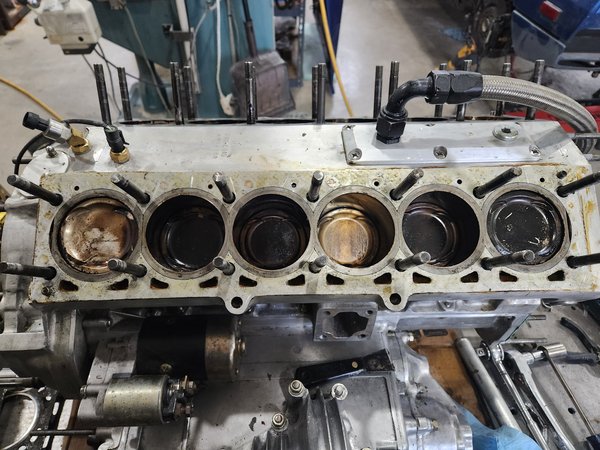
Now the important item the liners are basically flush with the deck. I don't know is something moved or I had a corner touching a radius or some such when I originally measured everything but they are flush now so I think I make the copper flame ring and aluminum head shim the same thickness and see what happens.
Attachment:
20240115_142921.jpg
20240115_142921.jpg [ 3.53 MiB | Viewed 2407 times ]

Looking at the pistons there was clearly still some leaking happening, hopefully viton orings work some magic.
Attachment:
20240115_135548.jpg
20240115_135548.jpg [ 4.5 MiB | Viewed 2407 times ]

Attachment:
20240115_151410.jpg
20240115_151410.jpg [ 3.55 MiB | Viewed 2407 times ]


The pistons cleaned up nice with a little lacquer thinner and the bores look great, yay again
Attachment:
20240115_155758.jpg
20240115_155758.jpg [ 3.18 MiB | Viewed 2407 times ]


Top
 Profile Send private message  
 
PostPosted: Tue Jan 16, 2024 7:31 am 
Offline

Joined: Tue Jan 06, 2015 8:09 am
Posts: 502
Maybe you will have to resort to dry decking the engine with coolant bypass hoses flowing the coolant. Drag racers do it all the time to keep coolant from being push out due to extremely high boost lifting the heads. No coolant passages means no leaks.

_________________
Wade Williams
Master Ferrari Tech
Restoration Tech
Engine Machinist
Fabricator
Racecar Driver


Top
 Profile Send private message  
 
PostPosted: Tue Jan 16, 2024 8:44 am 
Offline

Joined: Thu Jan 01, 2015 6:47 pm
Posts: 4687
MerlinTech wrote:
Maybe you will have to resort to dry decking the engine with coolant bypass hoses flowing the coolant. Drag racers do it all the time to keep coolant from being push out due to extremely high boost lifting the heads. No coolant passages means no leaks.


I'm not sure that is possible with wet liners?


Top
 Profile Send private message  
 
PostPosted: Tue Jan 16, 2024 5:13 pm 
Offline

Joined: Thu Jan 01, 2015 6:47 pm
Posts: 4687
OK, shims and flame rings ordered. Time to pull the valves and get them as straight at possible before shipping to Wade for his magic.


Attachments:
head shims.JPG
head shims.JPG [ 114.57 KiB | Viewed 2373 times ]
Top
 Profile Send private message  
 
PostPosted: Tue Jan 16, 2024 7:03 pm 
Offline

Joined: Thu Jan 01, 2015 6:47 pm
Posts: 4687
On second thought there is a fine line between tweaked and dangerously bent so I think I'm not going to take any chances and just go to go ahead and replace these valves....
Attachment:
20240116_174939.jpg
20240116_174939.jpg [ 3.6 MiB | Viewed 2370 times ]


Top
 Profile Send private message  
 
PostPosted: Tue Jan 16, 2024 8:06 pm 
Offline

Joined: Thu Jan 01, 2015 6:47 pm
Posts: 4687
It is not my night....my valves are discontinued. I found something I think is very similar from a better company (ferrea instead of kibble white) but in 29mm instead of the 28.5 and $47 each+$20 shipping :o . More money and I have so I will need to cut them down but I think they'll work


Top
 Profile Send private message  
 
PostPosted: Wed Jan 17, 2024 6:06 pm 
Offline

Joined: Sat Jan 03, 2015 10:13 pm
Posts: 794
Supply chains are difficult!


Top
 Profile Send private message  
 
PostPosted: Wed Jan 17, 2024 6:18 pm 
Offline

Joined: Thu Jan 01, 2015 6:47 pm
Posts: 4687
TheDarkSideOfWill wrote:
Supply chains are difficult!


Especially with "race" parts, they make whatever they please or don't please. The new valves have shipped and they included a FREE decal so well worth the extra money I guess.


Top
 Profile Send private message  
 
Display posts from previous:  Sort by  
Post new topic Reply to topic  [ 2707 posts ]  Go to page Previous  1 ... 210, 211, 212, 213, 214, 215, 216 ... 271  Next

All times are UTC - 5 hours [ DST ]


Who is online

Users browsing this forum: Bing [Bot] and 1 guest


You cannot post new topics in this forum
You cannot reply to topics in this forum
You cannot edit your posts in this forum
You cannot delete your posts in this forum
You cannot post attachments in this forum

Jump to:  
Powered by phpBB® Forum Software © phpBB Group